Tables
Table
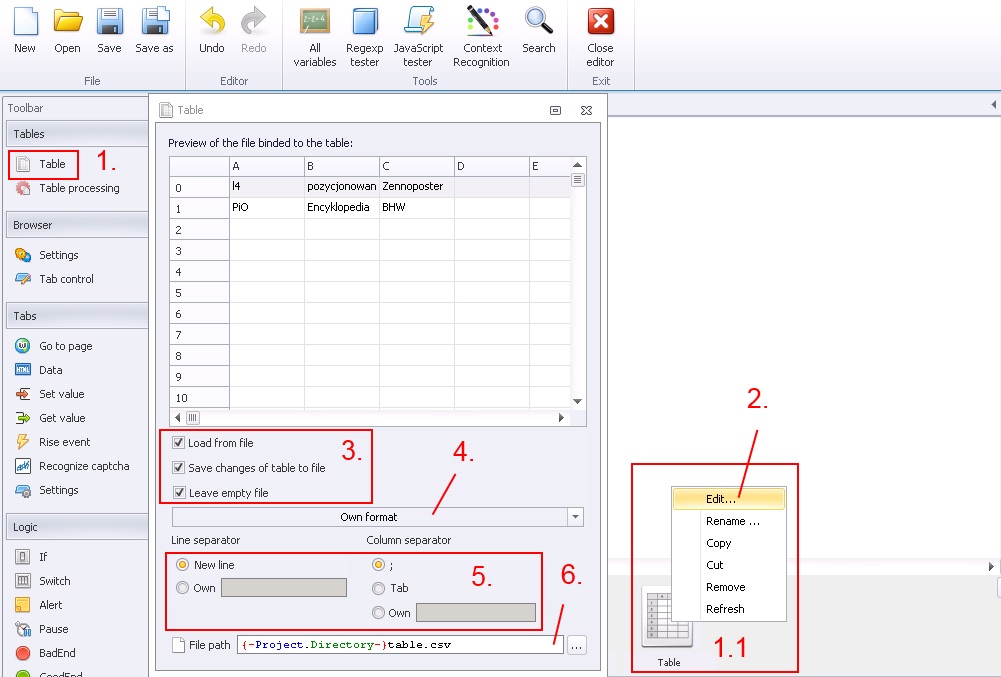
Processing data by using table. Working with tables use a lot of usage resource, so be careful with using that.
— ‚Load from file’
— ‚Save changes of table to file’
— ‚Leave empty file’
4. Table format:
— ‚Own’
— ‚.csv, .xls, .xlsx, .ods’
5. If you select own table format, you can define the line separator ‚Line separator’ and column ‚Column separator’.
Row separator:
— ‚New line’
— ‚Own’
Column separator:
— ‚;’
— ‚Tab’
— ‚Own’
6. Define table location.
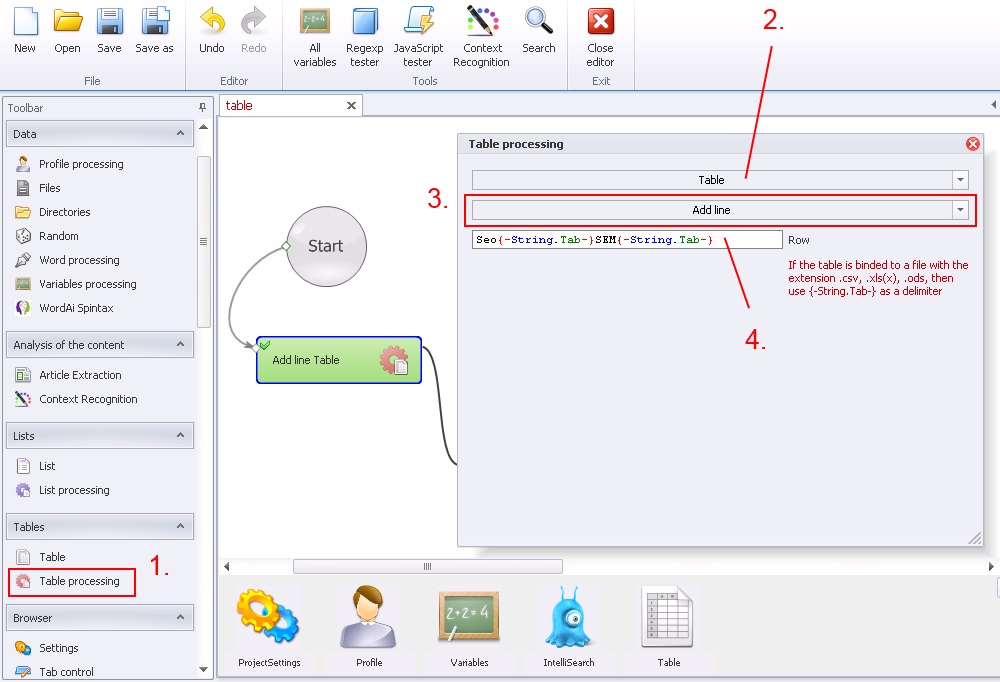
Table –> Add line
Adding new line to the table. The row will be added at the end of document.
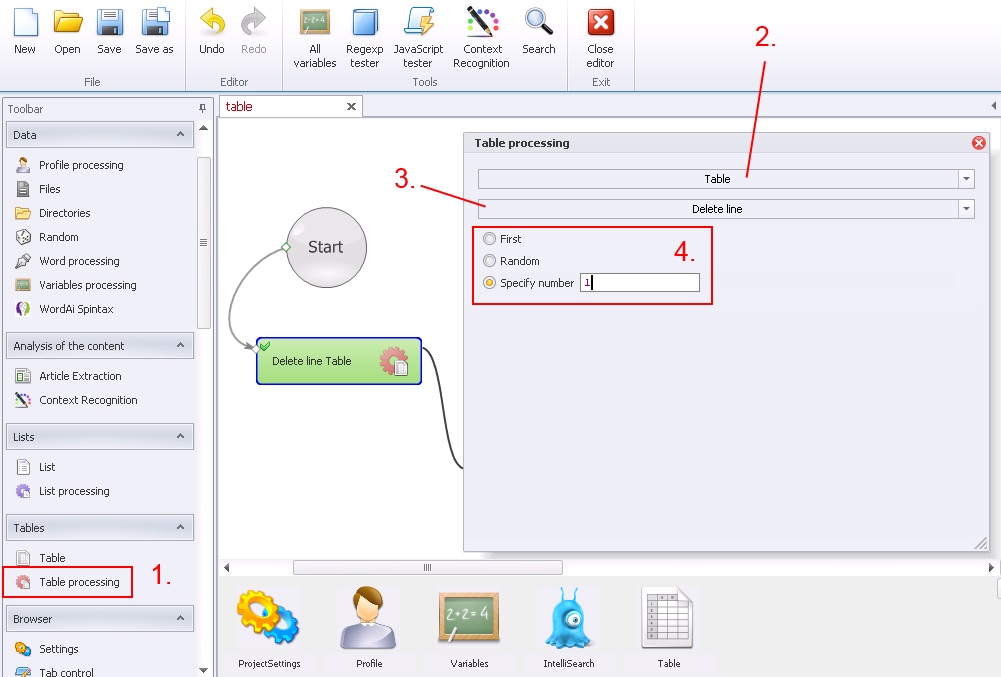
Table –> Delete line
Deleting line from the table.
— ‚First’
— ‚Random’
— ‚Specify number’
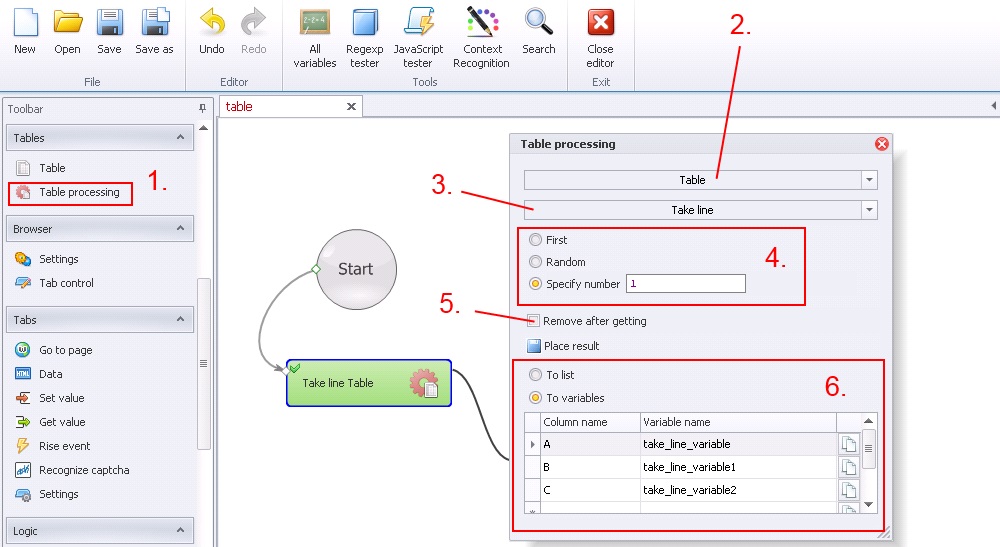
Table –> Take line
Loading the row from the table. You have the ability to load to variable all columns of the specific row, as well as just selected.
— ‚First’
— ‚Random’
— ‚Specify number’
5. Choosing this option will delete the line from the table after loading.
6. You can select from to saving modes:
— ‚To list’
— ‚To variable’. By saving row to variable you have the ability to seperate columns from the row. In the table you need to define the range of saving: ‚Column name’ and ‚Variable name’. The column names you will find here:
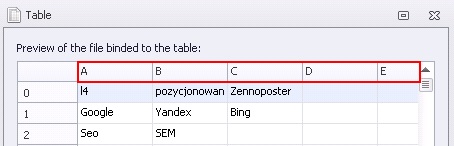
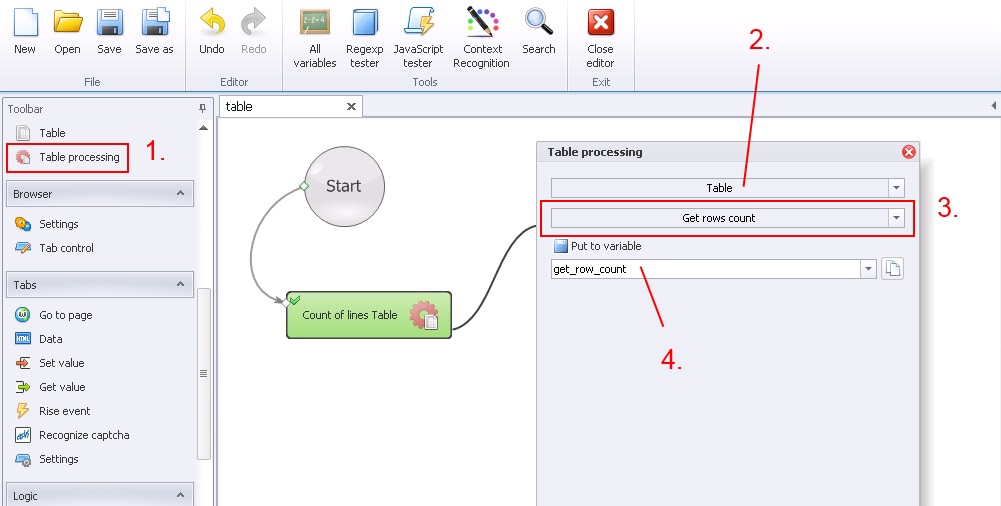
Table processing –> Get rows count
This functions summed the number of rows in tables and saving them in the right order to the variable.
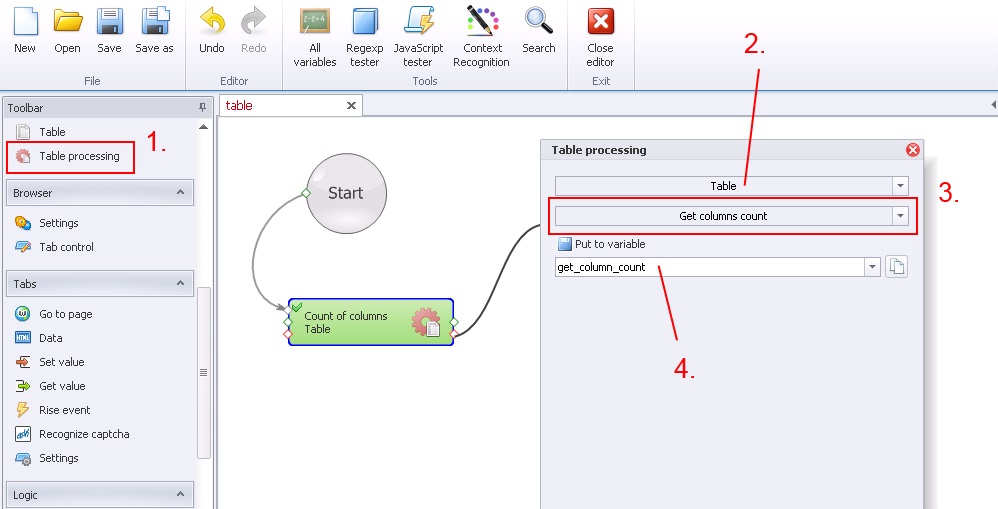
Table processing –> Get column count
This option summed the number of rows in the table and later save them in the right order to the variable.

Table processing –> Read cell
Read defined cells in the table.
— ‚Row’ – define in the digital value.
— ‚Column’ – define in the alphabetic value.
5. Create and save to variable.

Table processing –> Record cell
Precise record to defined cell.
— ‚Row’ – define in digital value.
— ‚Column’ – define in alphabetic value.
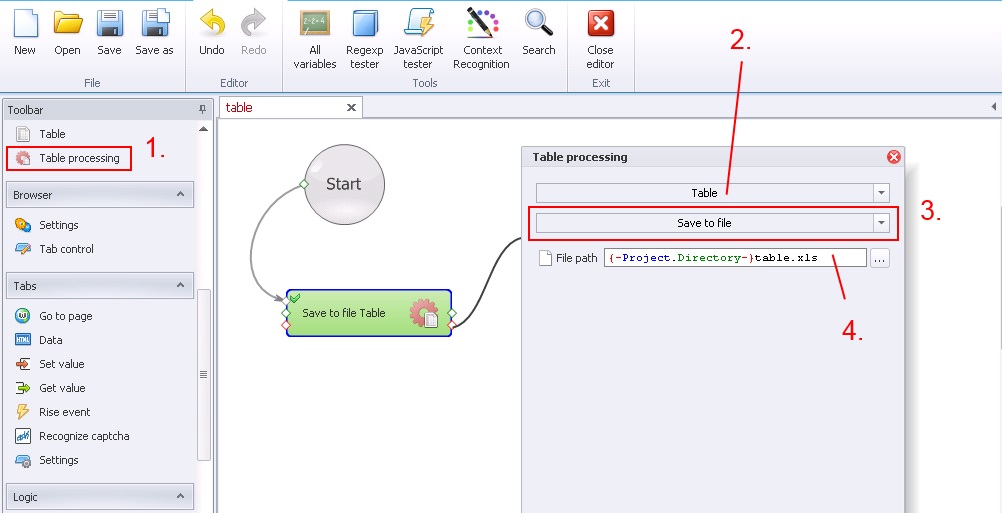
Table processing –> Save to file
Save table to the file. It is useful if you would like to change extension, for example from ‚.csv’ to ‚.xls’.
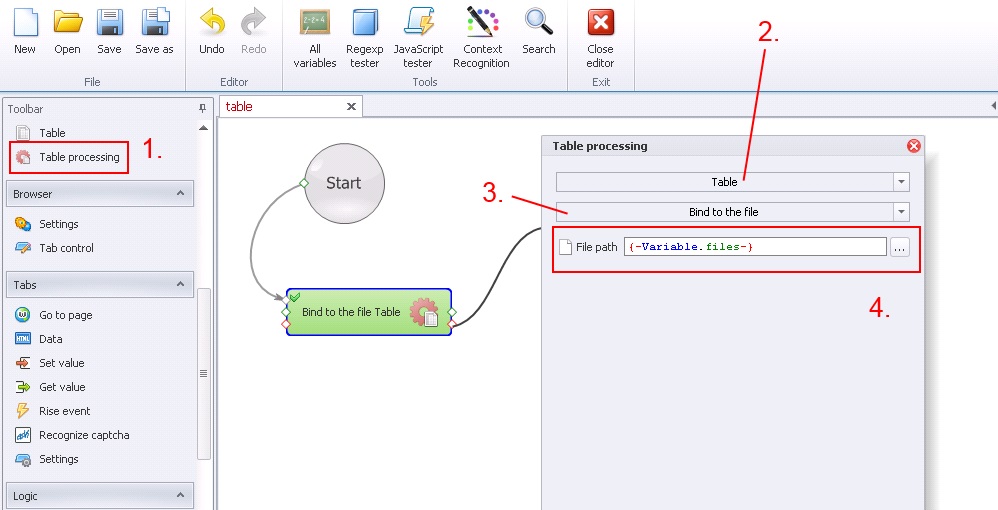
Table processing –> Bind to the file
Bind the file to the table. This function will bind multiple files into a single table.
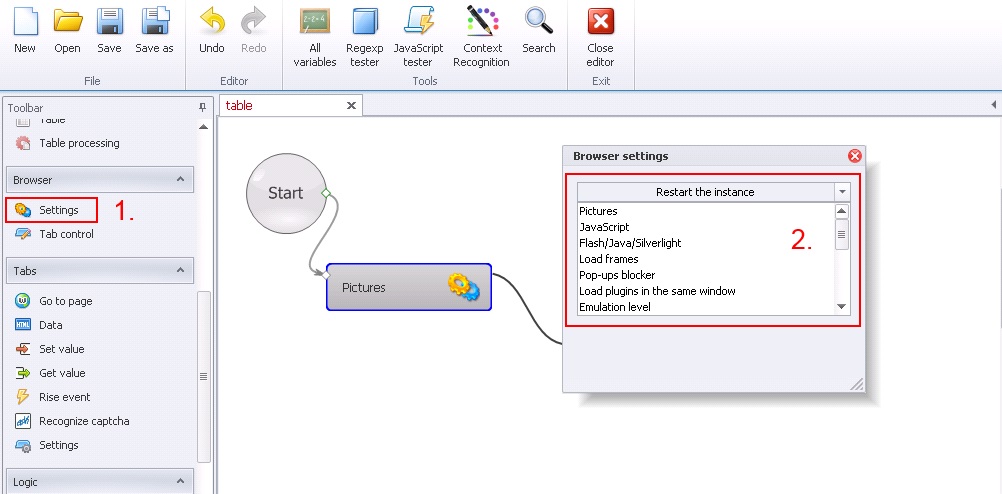
Browser –> Settings
This function helps with configuration browser to make your robot’s activity looks more like humanity activity. With the correct settings, you are able to outsmart even the most advanced protection mechanisms (like Facebook for example).
Pictures
Load pictures.
— ‚Enable’
— ‚Disable’
JavaScript
Load JavaScript.
— ‚Enable’
— ‚Disable’
Flash/Java/Silverlight
Load Flash/Java/Silverlight.
— ‚Enable’
— ‚Disable’
Load frame
Load frame.
— ‚Enable’
— ‚Disable’
Pop-ups blocker
Pop-ups blocker.
— ‚Enable’
— ‚Disable’
Load plugins in the same window
Load plugins in the same window.
— ‚Enable’
— ‚Disable’
Emulation level
Activation emulation level.
— ‚Enable’
— ‚Disable’
Download to
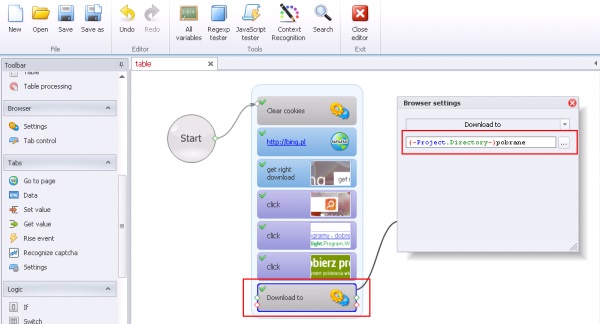
This function define files location (folder) for downloads files. Look on the sample template. After doing that will be created ‚Download’ folder, in which will located this install file.
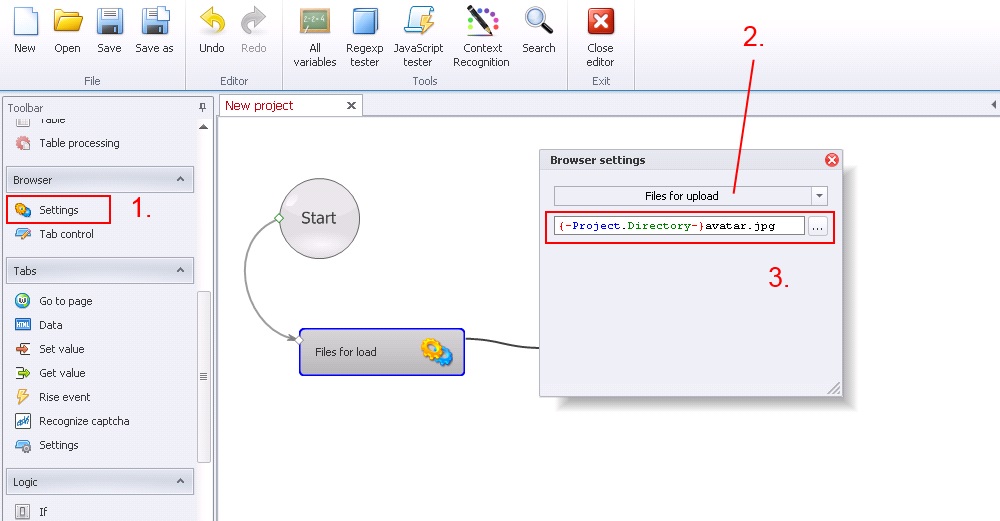
Browser –> Settings –> Files for upload
Define file location to upload. This can be useful, if you would like to insert avatar on the profile.
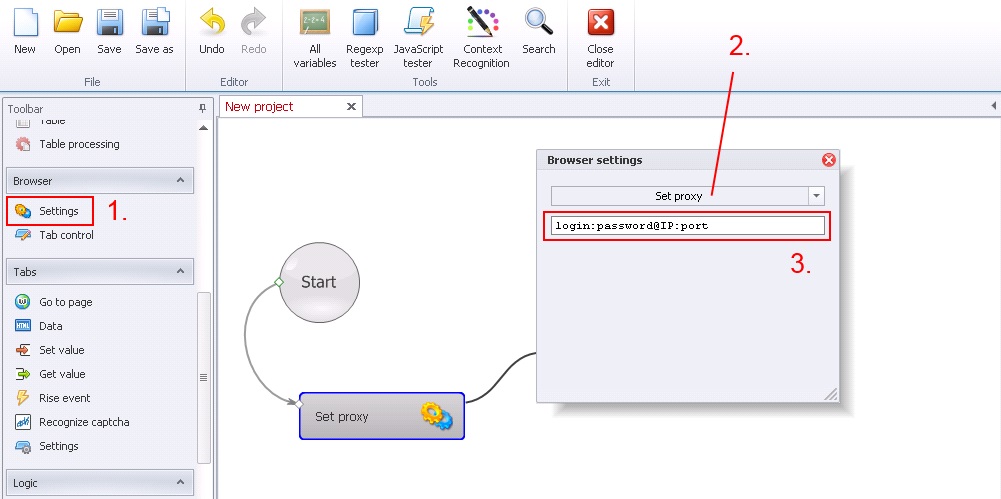
Browser –> Settings –> Set proxy
Set proxy. If you have your own proxy with login and password format should be exactly like this: login:password@IP:port
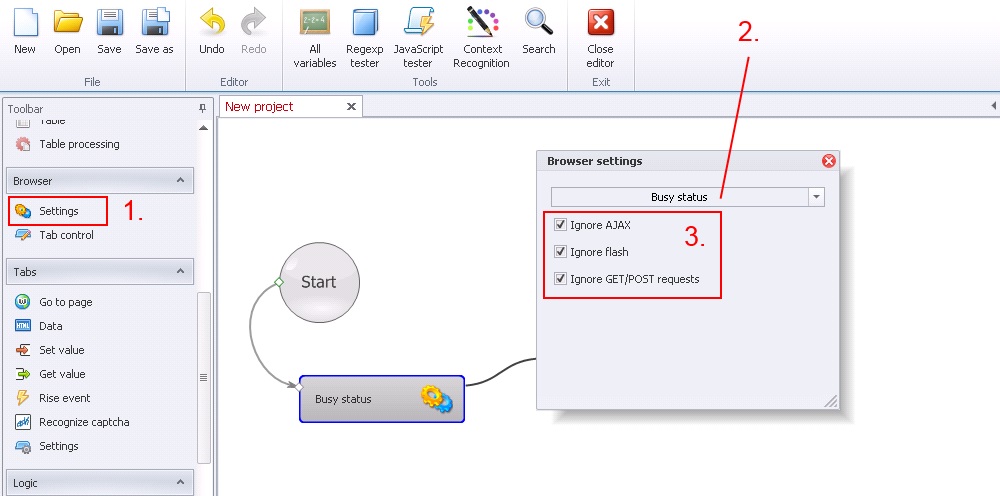
Browser –> Settings –> Busy status
Busy status. This function is useful, if during doing one project page is loading and loading all over again and you have problem with moving to the next step. If you don’t want more situation like that I recommend to you ticking all three options.
— ‚Ignore Ajax’
— ‚Ignore Flash’
— ‚Ignore GET/POST request’
I not really recommend you using this function, but if you truly need it – use it. On pages with really good antyspam and advanced protection mechanisms (like Facebook for example) block these technologies prevent you from success of the project.
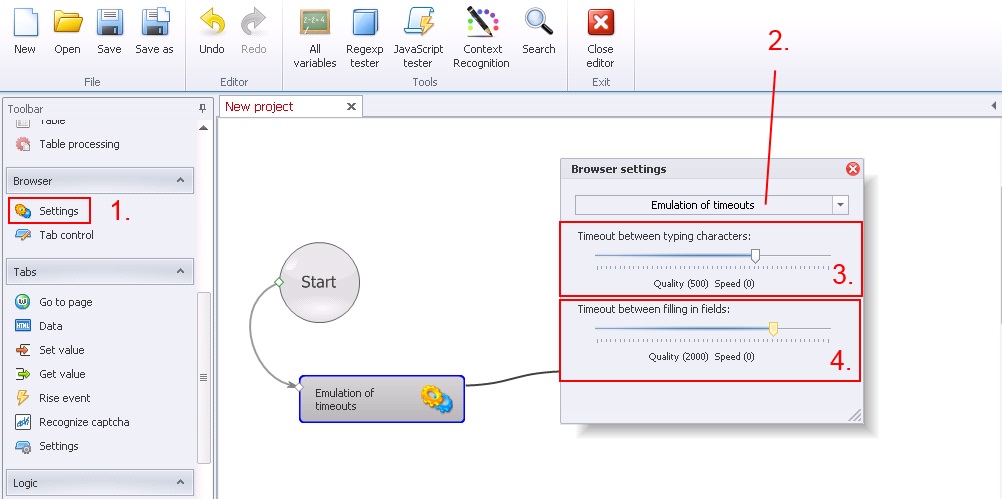
Browser –> Settings –> Emulation of timeouts
Emulation of timeouts. Greater parameters of timeouts between typing characters or filling fields makes robot more reliable for protection mechanisms.
Browser –> Settings –> Restart the instance
Restart the instance.

Browser –> Tab control
Tab control.
— ‚Tab name’ – define tab name.
3. Select ‚Active Tab’ from the drop-down menu.
— ‚By name’
— ‚By number’ (0 is the first tab).
4. Select ‚Close tab’ from the drop-down menu.
— ‚Active’
— ‚By name’
— ‚By number’